

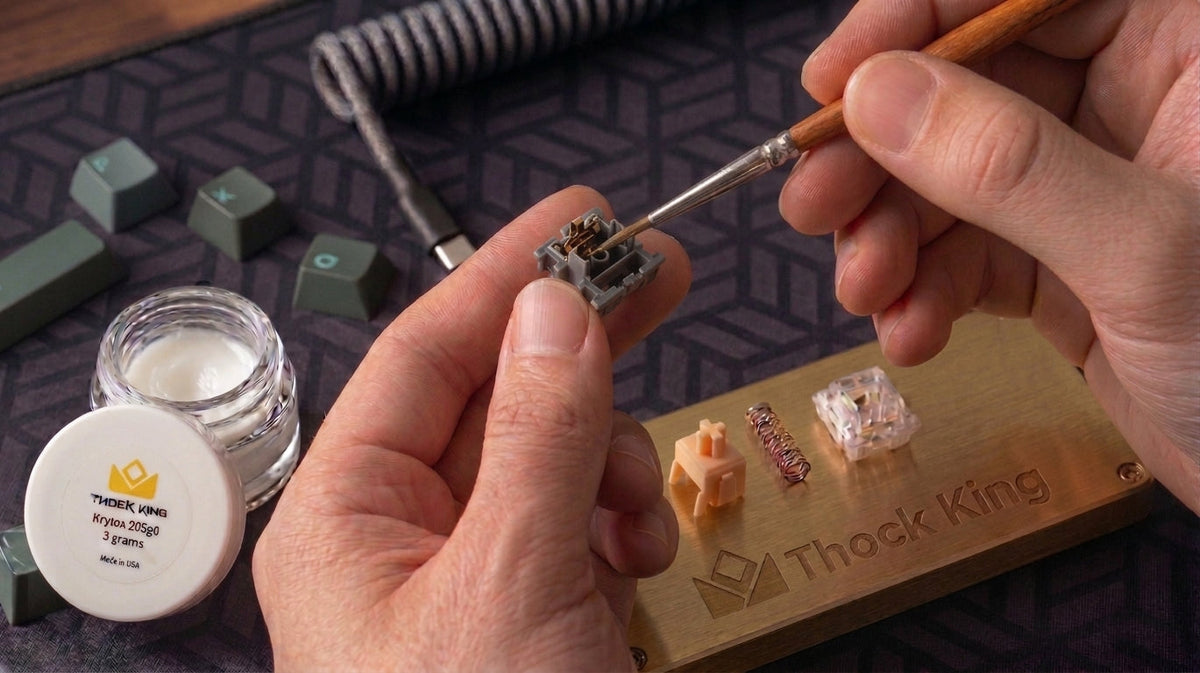
If you're looking to achieve that deep, acoustic "thock" or that buttery-smooth, "creamy" sounding keyboard, hand-lubing your switches is the single most impactful modification you can make.
While the transformation in sound and feel is night and day, hand-lubing switches is a meticulous, time-intensive process that requires precision, patience, and the right tools.
Whether you're gearing up for your first DIY session or deciding if you'd rather skip the hours of tedious labor or curious how the experts at Thock King lube switches, here is a complete, Thock King's guide on how to properly lube linear and tactile switches step by step.
Essential Tools & Materials Needed
Before you get started, gather these essential modding tools on a clean workspace:
-
Switch Opener: A dual MX/Box style metal switch opener.
-
Fine Detail Paintbrush: Size #0 or #00 round brush.
-
Lube Lubricants:
-
Krytox 205g0: Best for linear switch housings and stems.
-
Tribosys 3203: Ideal for tactile switches (like Gazzew Boba U4T) to preserve tactile bump profile without drowning tactile feedback.
-
Krytox 105 High-Viscosity Oil: For quick, even spring bag-lubing.
-
-
Switch Films (Optional): Highly recommended for older switches.
-
Lubing Station: Keeps components organized and prevents loss.
-
Microfiber Cloth / Alcohol Wipes: For cleaning up excess lube.
-
Nitrile Gloves (Optional): Switch lubricants are water-resistant and notoriously stubborn to wash off skin!
Step 1: Disassembly & Inspection
-
Place your switch into the switch opener tabs and press straight down until the top housing clips disengage.
-
Separate the switch into four distinct components:
-
Top Housing
-
Stem
-
Spring
-
Bottom Housing
-
-
Place all matching components into separate trays.
-
Wipe Off Excess Factory Lube: If your switches came pre-lubed from the factory with inconsistent oil or grease, take a clean microfiber cloth or cotton swab to wipe down the stem rails and bottom housing before applying fresh lubricant.
Step 2: Bag-Lubing the Springs (The Pro Shortcut)
Instead of manually brushing 70 to 110 individual springs—which takes forever—the bag-lubing method ensures an even, rattle-free coating in seconds. This method is used for both linear and tactile switches.
-
Place all your switch springs into a small plastic ziplock bag.
-
Add 10 to 12 drops of Krytox 105 oil into the bag (for roughly 70–90 springs).
-
Trap air inside the bag, seal it tight, and shake vigorously for 30–45 seconds and set aside.
Step 3: Lubing the Bottom Housing
-
Take your paintbrush and dip just the tip into your chosen lube (Krytox 205g0 for linear or Tribosys 3203 for tactile). Use the cap of the lube jar to dab the brush and spread the lube evenly across the brush.
-
Lightly brush the inner slider rails on both the left and right sides of the bottom housing.
-
Golden Rule: Less is more! The lubricant layer should look glossy and translucent—never opaque white or heavy.
Step 4: Lubing the Stem
The stem is where key travel friction happens, making precise application critical:
-
For Linear Switches: Lightly coat the two side slider rails, the front slider face, and the back slider face. You can apply a light coat to the stem pole as well.
-
For Tactile Switches (e.g., Gazzew Boba U4T): Lube the side slider rails and back of the stem, but avoid lubing the legs unless you intentionally want to reduce or soften the tactile bump!
-
Beware of Overlubing: Applying too much lube causes a mushy bottom-out, sluggish key return, and an unnatural "squishy" sound.
Step 5: Adding Switch Films (If Necessary)
Films sit between the top and bottom housing. We highly recommend switch films for older switches (like Gateron, C3Equalz, Durock) that have loose tolerances. Newer switches (like HMX) have tighter tolerances and often do not need them.
-
Place the film flat on top of the lubed bottom housing, aligning the cutouts with the housing leaf and LED slot.
Step 6: Careful Reassembly & Re-seating
-
Retrieve a bag-lubed spring give another quick shake and use tweezers and seat it vertically into the bottom housing center well.
-
Place the stem onto the spring, ensuring the stem legs face the metallic leaf contacts in the bottom housing.
-
Align the top housing over the assembly ensuring that the RGB windows are on the same side.
-
CRUCIAL Pro Tip for Tight Tolerance Switches: On switches with tight tolerances, gently press down on the stem stem before fully snapping the top housing clips shut. This prevents internal stem misalignments or bent leaf contacts during reassembly!
Step 7: Testing & Pin Check
-
Press Test (Very Important): Press the stem down fully several times. Listen for smooth travel, zero spring crunch, and instant snap-back return. If you feel sudden resistance or a "crunchy" feeling, open the switch immediately—you have usually accidentally damaged the switch or the leaf is misaligned.
-
Backwards Pin Inspection: Flip your lubing station upside down and look across the bottom pins of every switch. Confirm that both copper contact pins are 100% straight and unbent before inserting them into a PCB socket.
Skip the Tedium: Let Thock King Hand-Lube & Film Your Switches!
While hand-lubing switches is a fantastic rite of passage for keyboard enthusiasts, manually prepping, opening, lubing, filming, and testing a full 90-switch board easily takes 3 to 5 hours of painstaking work. It is a lot of meticulous work if you don't know exactly what you are doing.
If you want the deep thock and creamy feel without the lube-covered fingers, potential switch damage, or fear of overlubing, Thock King has you covered!
Why Choose Thock King Custom Lube & Film Service?
-
Choose from Over 200+ Switches: We provide a service to lube and film any switch in our vast catalog of premier linear, tactile, and silent switches.
-
Tailored Formulas: We use custom-tailored lube combinations for every switch type—Krytox 205g0 for silky linears, Tribosys 3203 for crisp tactiles, and Krytox 105 bag-lubing for all springs.
-
100% Hand-Serviced & Quality Checked: Every single switch is hand-disassembled, individually brushed, assembled with appropriate films, and press-tested by our team before it ships.
-
Zero DIY Stress: Your custom lubed switches arrive ready to drop straight into your hot-swap board!
Simply select the Hand-Lubed & Filmed option directly on any switch product page when ordering from Thock King, and let us handle the hard work for you!
Share:
Top 5 Best-Selling Tactile Mechanical Keyboard Switches of 2026
Gateron x Sillyworks Type R vs. Durock Ice King: Which Tactile Switch Should You Buy?